In this portfolio, I will be detailing how I created the production piece outlined in my previous proposal, that being the sensory room 360 video project.
Open Brush
As part of the piece, I decided to experiment with adding Open Brush to my production pipeline to see if it could be a viable way of creating the concepts for each scene and creating the initial 3D models, as Open Brush sketches can be imported into Blender.
I recorded myself creating each of the scenes that I wanted to import to Blender for animation to show my learning process. I have increased the speed for ease of viewing.
I used the developer brushes as there was more variety in the geometry and object brushes than in the default selection. The guides were helpful in creating the square rooms that I wanted, though it was more difficult for the horror scene as multiple guides tended to snap the cursor in odd directions and put brushstrokes where they weren’t wanted.
A few times, I sat myself down in the beanbag chair that I had created for the calm room in order to make sure that the room was roughly the right scale.
I kept the sketches for each scene rough so that I could build on them later in Blender and add the right textures to the objects. Unfortunately, when importing, I found that the topology of the objects that I had made in Open Brush was going to be way to messy to work with, so in the end I used these as examples and started from scratch.
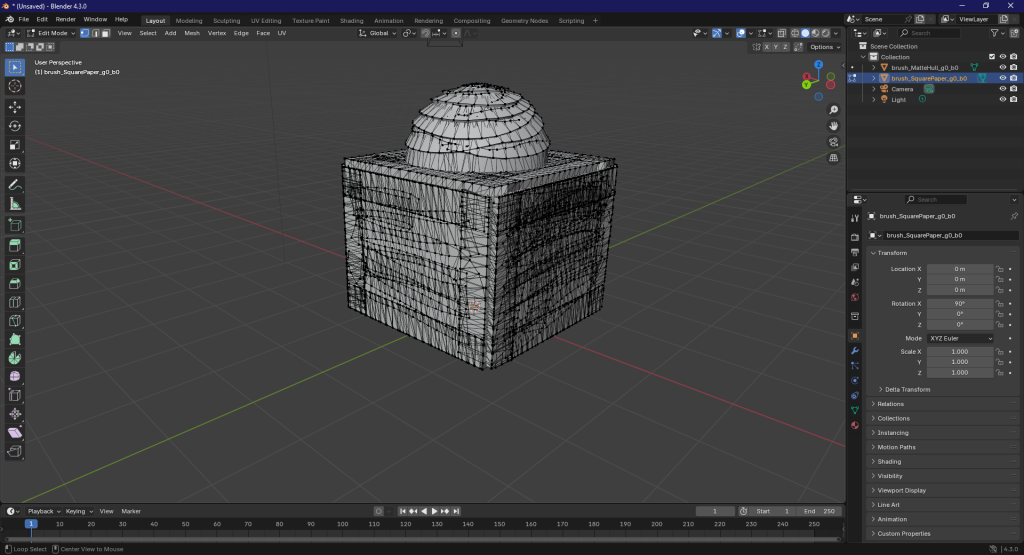
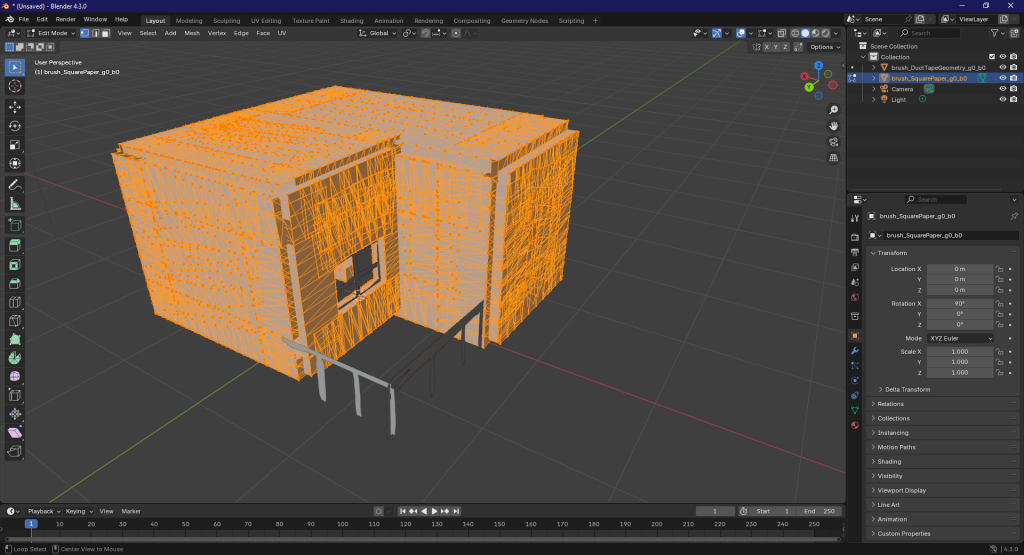
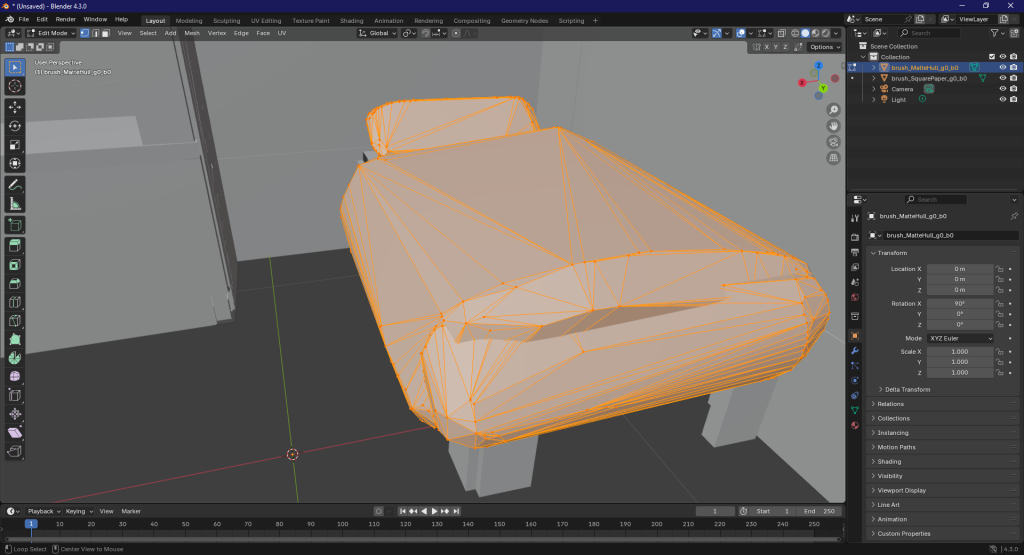
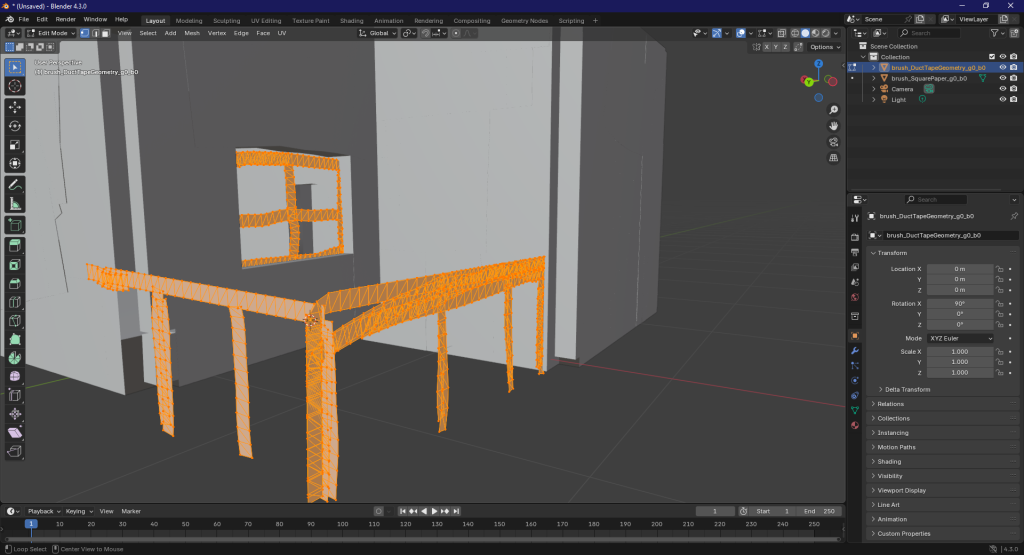
All in all, I found Open Brush to be an interesting stage in developing my piece, though I personally do not believe that it is suitable yet to be fully integrating into a production pipeline. I thought that being able to draft the environment to a realistic scale was useful; I was able to use the videos I had taken of myself as reference when deciding the height of the viewer camera in my Blender scenes and ensure that the props were roughly the correct size when recreating them. Importing to Blender from the programme was easy, but the state of the geometry was disappointing, and I wish that my work in the programme had been translated better so that I could have used it as more than just a more complicated reference.
Blender
As mentioned, I’m using Blender for the majority of this project to create the bulk of the scenes. This includes the props, lighting, and materials.
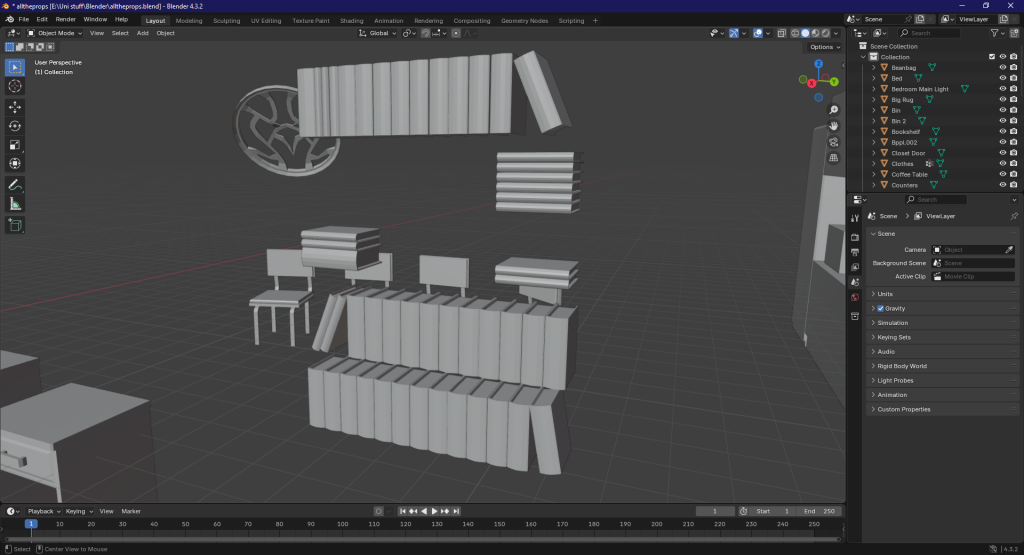
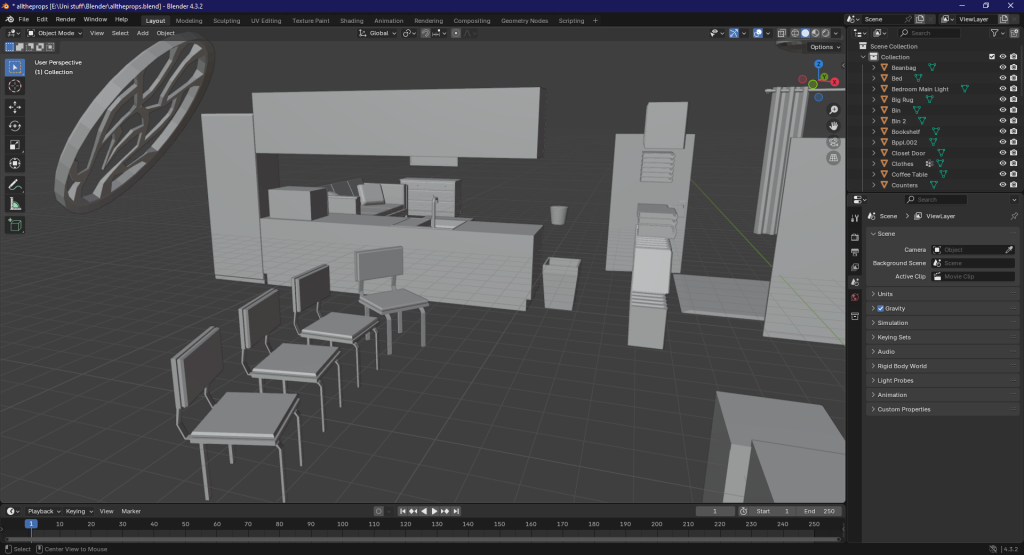
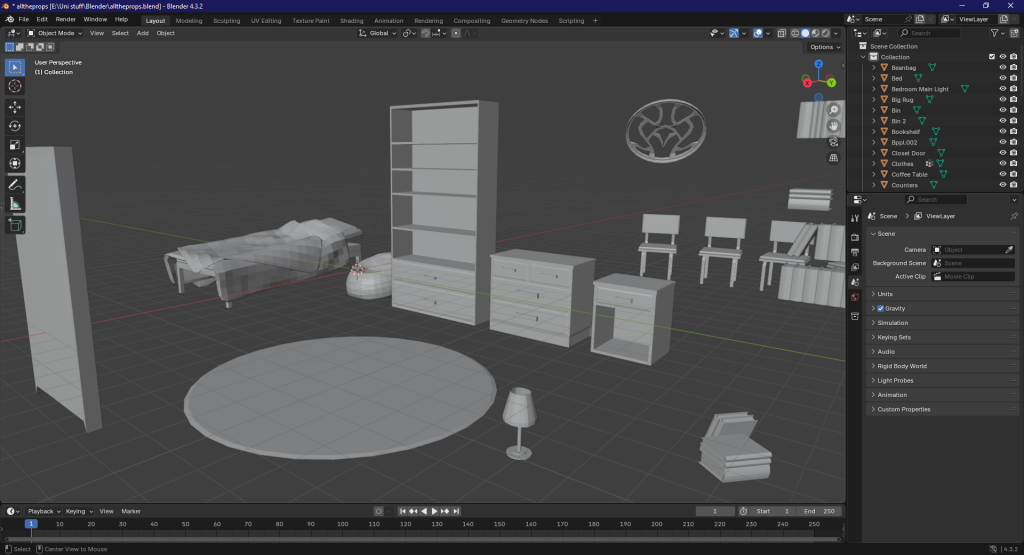
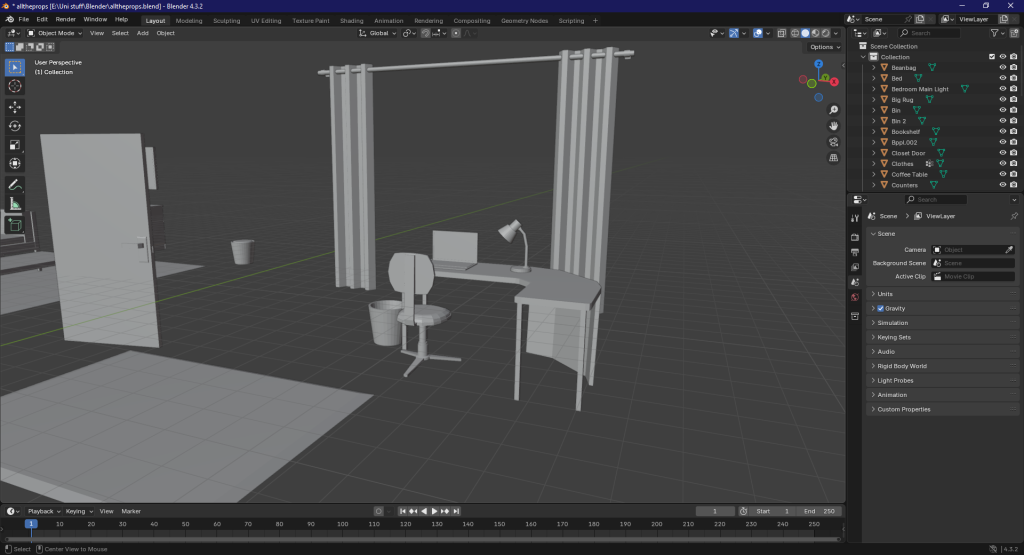
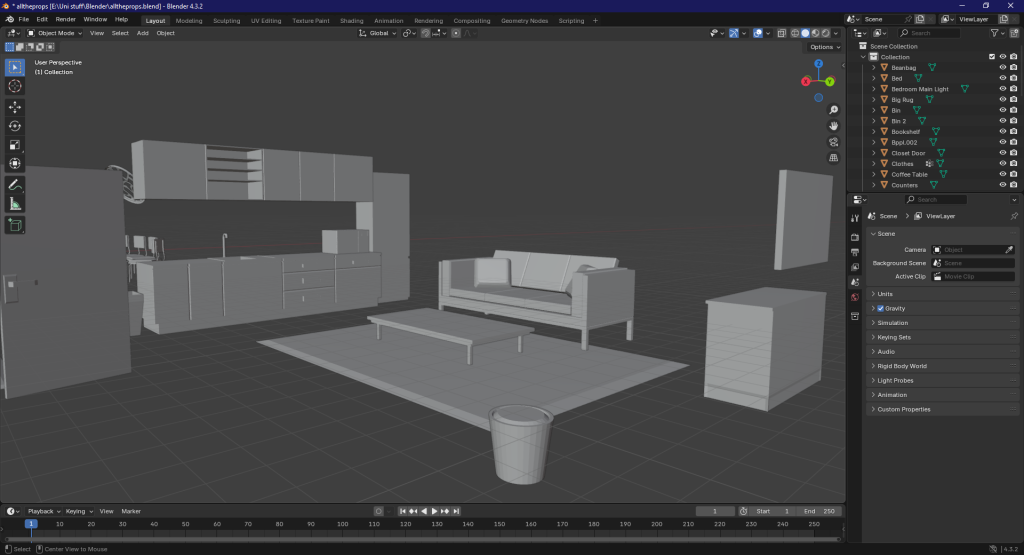
These are all the assets I created in Blender for each of the three scenes. Where possible, I re-used models to save on time and to keep the low-poly art style consistent, and re-used materials where possible.
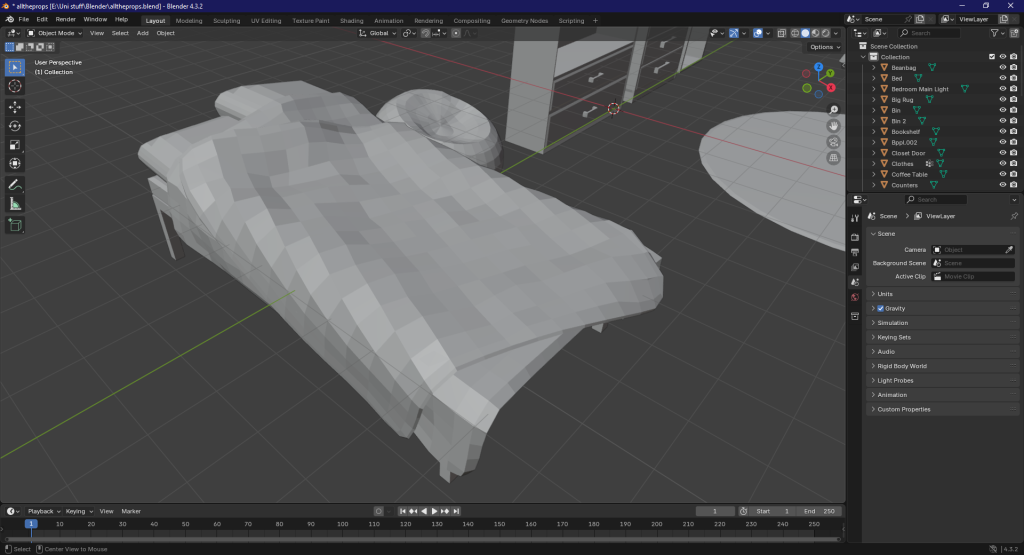
For the bed, I used cloth simulations to create the duvet and the blanket, draping planes over the bed base to make it look as natural as possible.
I realised after I had finished making the bed that I should have remembered to have the planes self-collide in the simulation. This is after I ended up having to waste time fixing the geometry as when the plane collided with the bed, it had clipped into itself. I also did a cloth simulation for the beanbag chair using a deformed sphere, and while I wanted to use this technique for the pillows on the bed as well, I ended up modelling one of of a cube and duplicating it as it wouldn’t fall the way that I wanted it to when I ran the simulation.
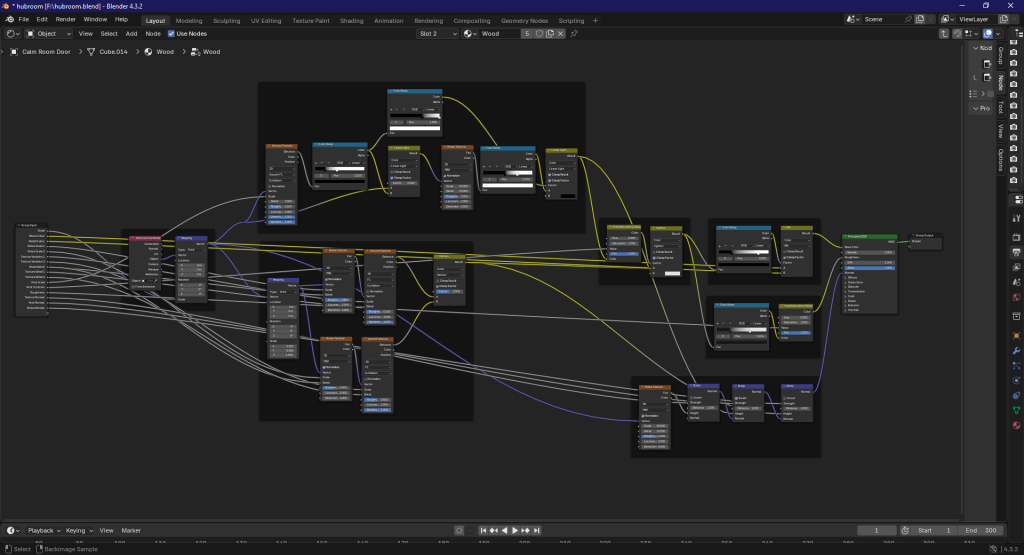
As part of the texturing, I wanted a more complex wooden material for the furniture in the scenes, and possibly for the floors, so I used this tutorial to create something similar using material nodes:
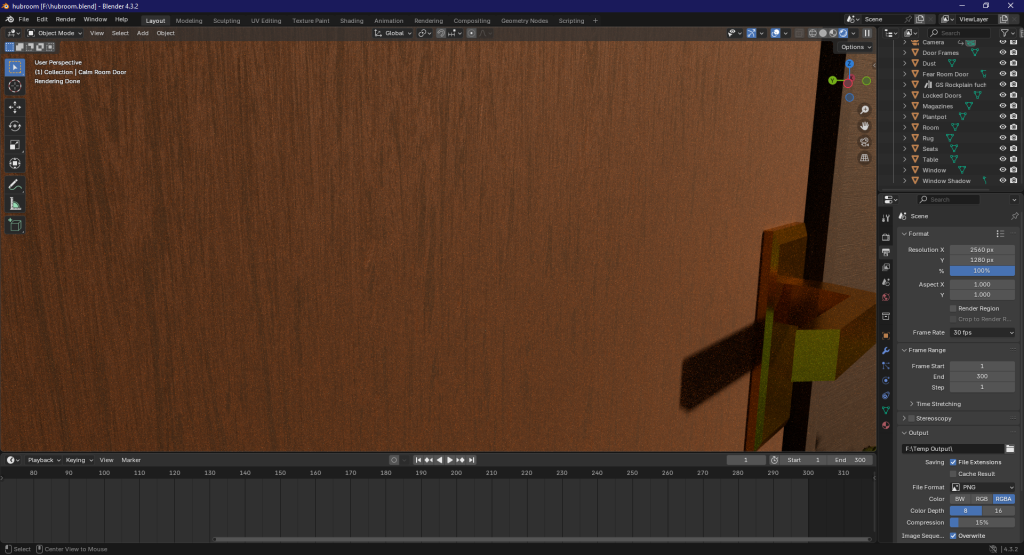
If I were to go back to this part of project development, I would definitely have applied some level of detail to more of the textures than just the wood. I had thought about looking into adding tarnish to the metals in the various scenes, but I decided against it, and I think that was a mistake as I am not very pleased with how clean the final renders look.
For the hub room and the calm room, I wanted to add dust and god rays to add depth to the lighting. To make the dust, I initially followed this tutorial:
However, after creating the shape and the textures necessary to make this work, I found that rendering the scene with an animation like this would take too much time and be too resource heavy for what I wanted, so I decided to stick to creating the god rays only.
This was achieved by creating two separate light sources, both being area lights. The first area light would behave as normal, and bounce light off other objects in the scene. The second would not bounce off surfaces, and would instead illuminate an object that has a volume texture. Both lights are placed outside the rooms so that they cast light in the shapes of the windows I had made for each room.
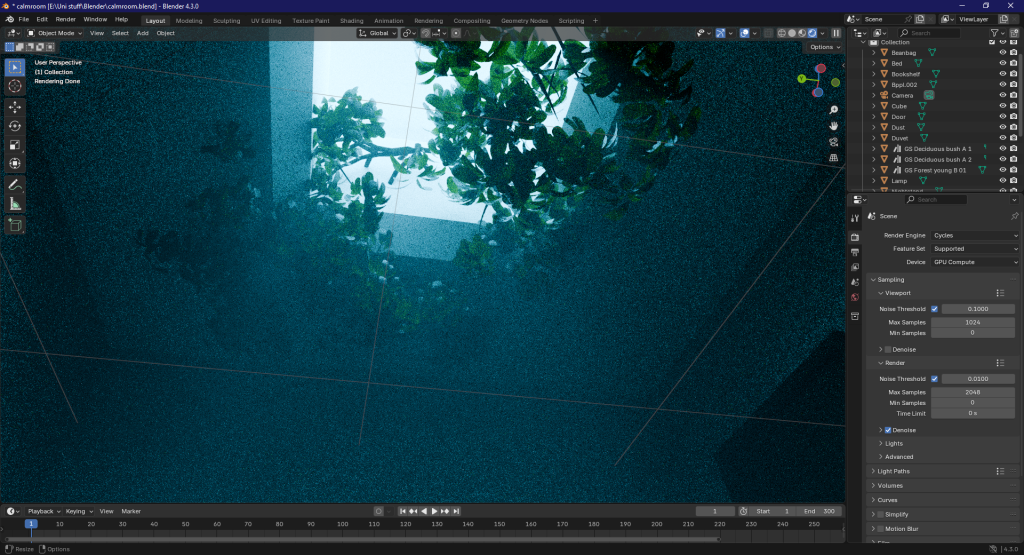
Overall, the biggest issue I had with using Blender was figuring out the amount of samples and the resolution that would keep the render times down. With a project this large, I was spending multiple days rendering out the frames I needed for animation, and I only realised very late into rendering that the amount of samples I was using was way too large for my render, significantly increasing the wait time.
In future, it’s important that I make sure I’m using the most optimal settings, or the larger versions of this project that I had planned, with more rooms added to the hub, would take too long to be sustainably maintained.
Hub Room
The storyboard for this room was in black and white, but I had mentioned in my proposal that I wanted something warm and cosy, so I used mainly wood and warm colours like gold and cream with a rich set of turquoise and blue colours as a contrast. The lights also lean towards a yellowish tone to add to the atmosphere.
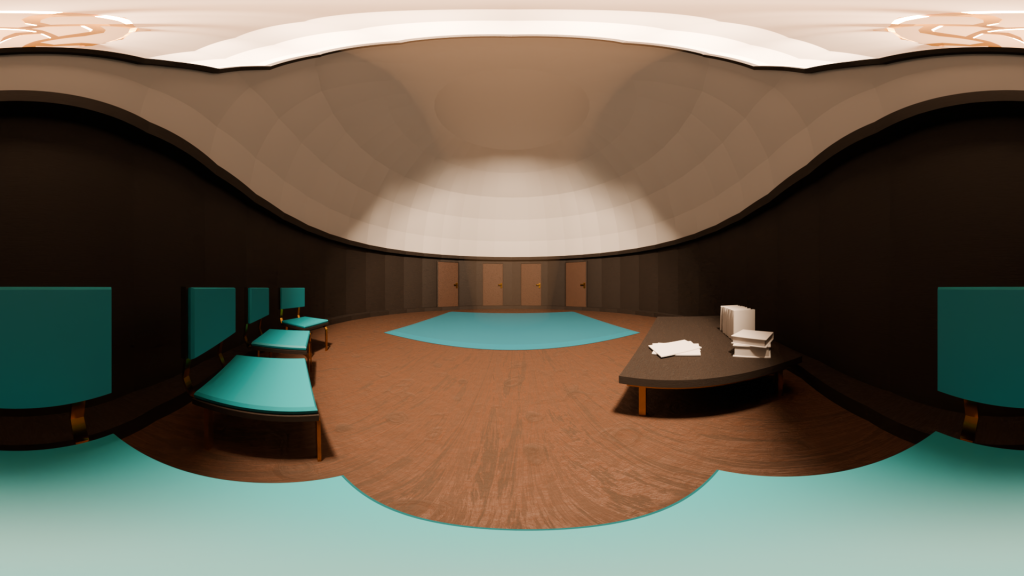
I had made a frame for the window in this room with the intent of casting a pretty shadow on the floor. Unfortunately, this didn’t work, so I had to duplicate the shape and scale it up inside the room to get the look I wanted. I had to turn off the camera checkbox in the object’s ray visibility so that it would only cast a shadow in renders.
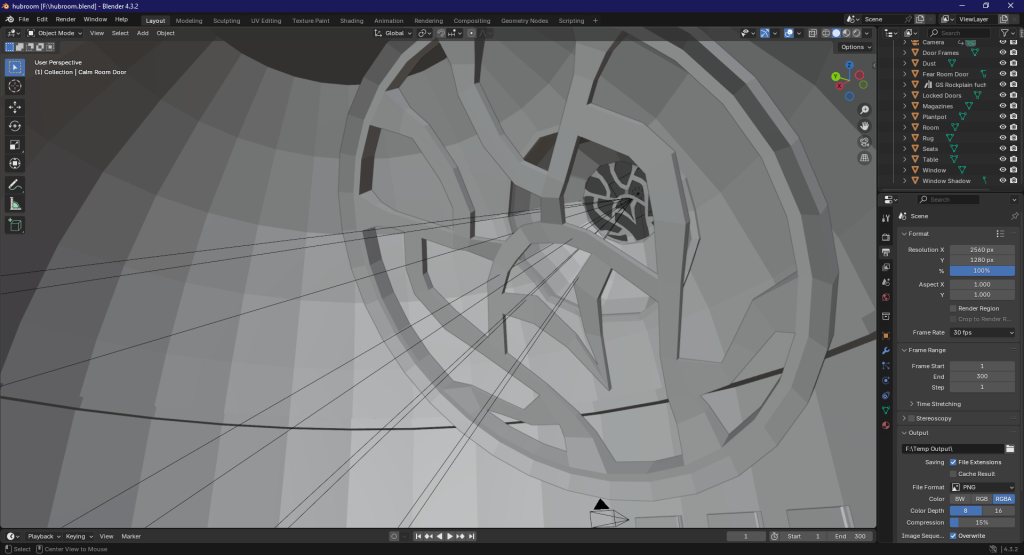
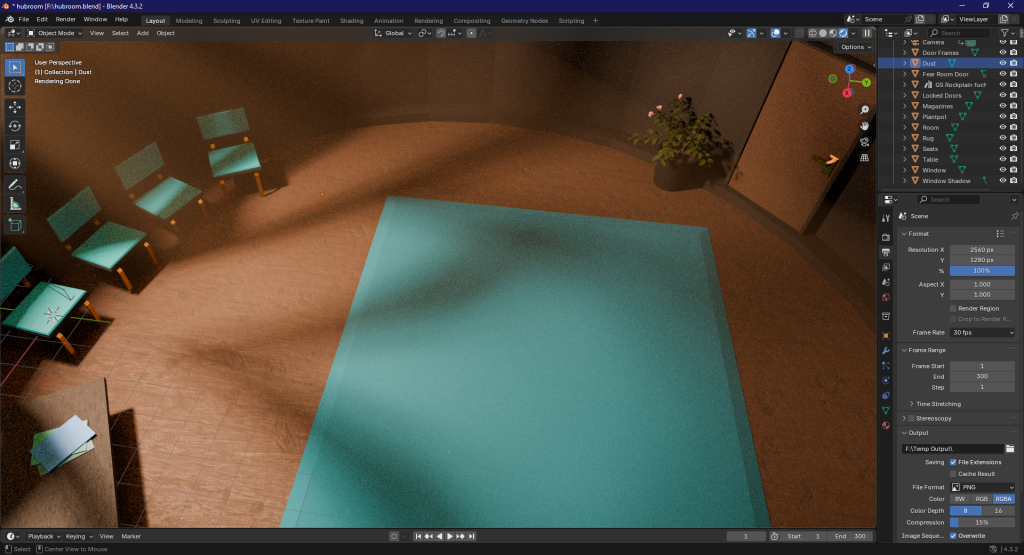
For the animation, I wanted the viewer to walk towards one of the doors and have it open into the scene that the door led to, so I did a quick blocked animation with the camera to make sure I kept the speed of the camera movement slow and steady.
I had considered the final rendered animation of this room done, but after doing a few more test renders of the horror themed room, I realised that the moving camera was an issue. Because of this, I changed my initial plan to have the viewer walk up to their chosen door, and instead kept them static in the chair that I had put the camera in.
Final render for the Hub Room (before editing):
Calm Room
Using the Open Brush sketch, I did a test to make sure that I had my camera at the correct height to make it look as though the viewer is sat on the beanbag chair. I found that the camera made me a little too tall here in the end, so that was adjusted later.
After the light set up to create the god ray in this room, I wanted to emulate my storyboard and cast leaf shadows on the floor. In a similar dilemma to the hub room, the leaves wouldn’t cast any shadow at all, even when I enlarged the bush and placed it in the room, so this scene has an extra spotlight that hovers just above the bush to create the clear shadows.
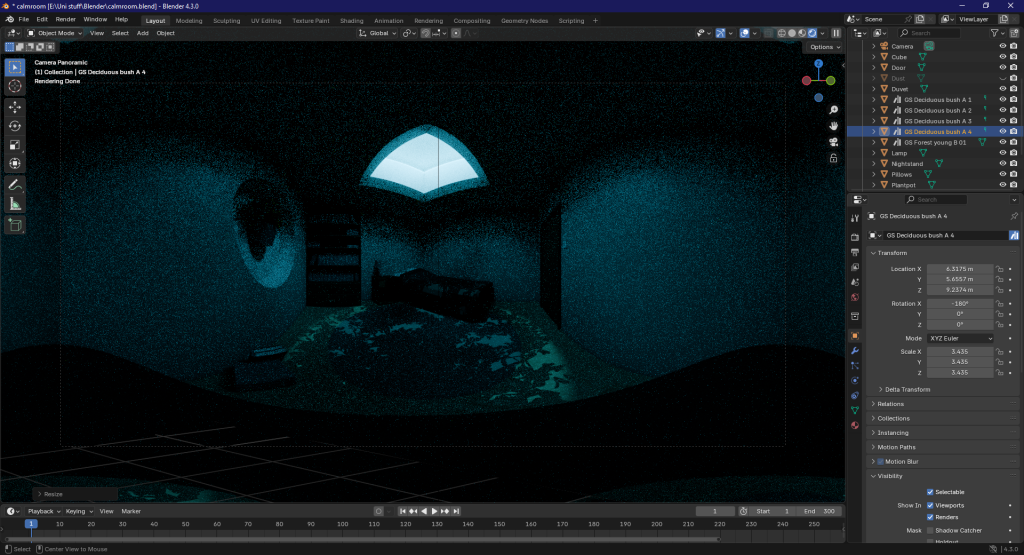
My initial test for this was way too dark; I tend to enjoy moody lighting, but on other displays, people often tell me that they can’t see what is going on at all, but I had the effect that I wanted, so I moved on to improving the lighting.
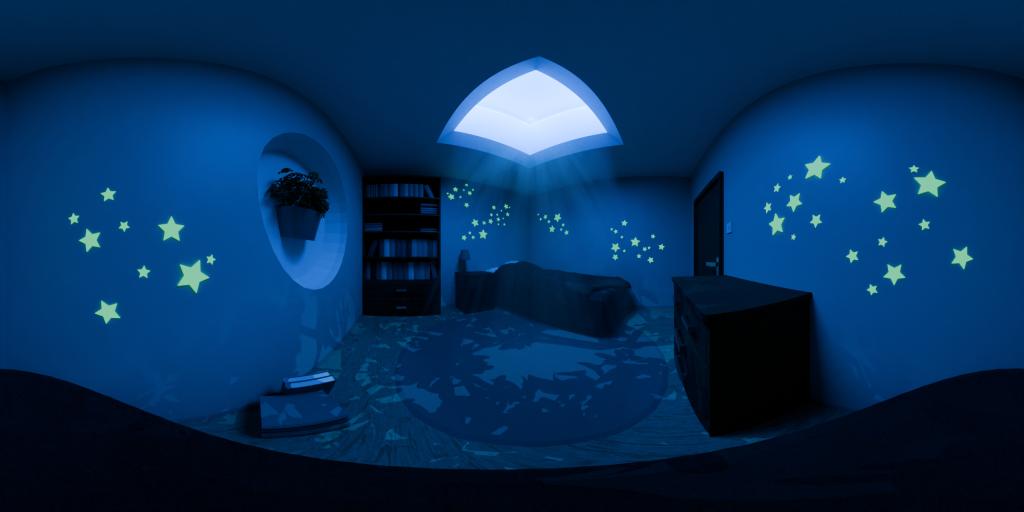
While doing that, I also did a few colour tests for the scene, attempting to get as close to my initial storyboard as possible by giving each light in the scene an individual colour. For example, the orange ‘sunset’ has a red area light, a deep orange area light, and a warm yellow spotlight.
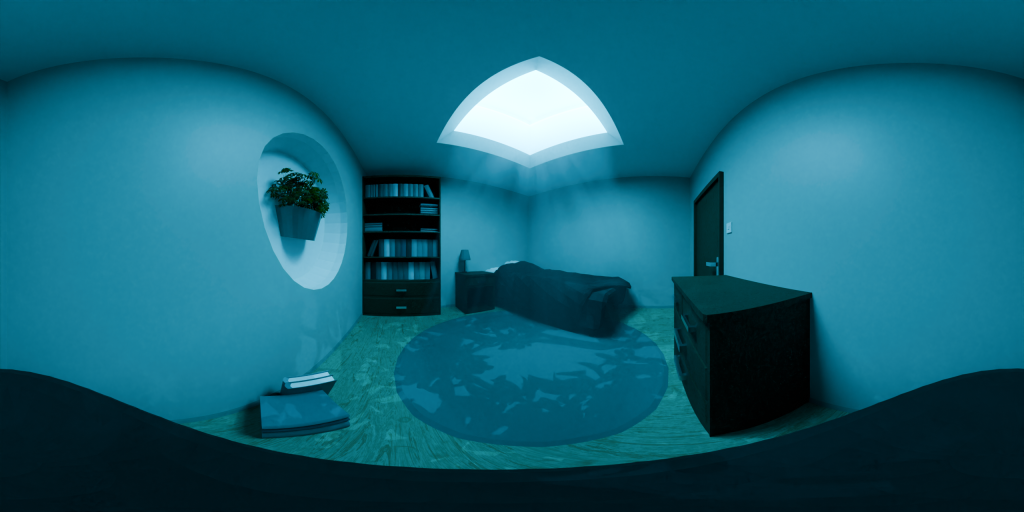
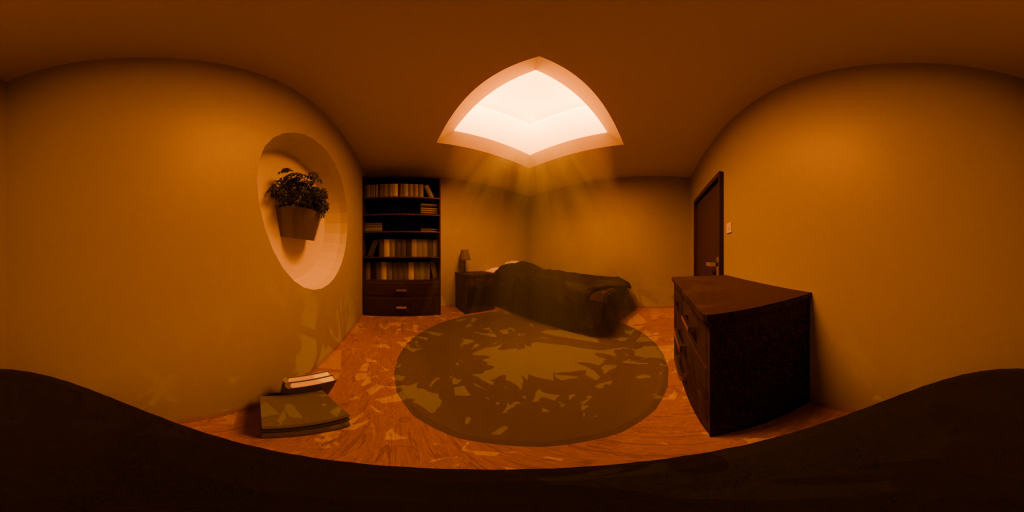
Another addition that I wanted to add to the leaves was that they were going to sway with the ‘outside’ breeze. As I wasn’t sure how to get that to happen without trying to pull apart the model and hand-animate it, I had to look for a quicker solution elsewhere.
With this small addition to the bush, I was able to make it look as though it was swaying without keyframing; it would just sway as the other animation played out. I could have paid more attention to this, however. I had tweaked the function to make the sway less pronounced and slower, but I had actually made this bush by combining two together, and I think I should have kept them separate so I could have applied the expression to both and made it look more natural overall.
Because I intended to have a bit more control over the timings using Premier Pro, I rendered the colour transition animation and each of the three colour stages separately to stitch together. Unfortunately, with the way that the leaves swayed, this ended up looking pretty jarring, so I discarded the idea and just had the colour transition slowed down.
Final render for the Calm Room (before editing):
Horror Room
Using the basic layout of the Open Brush sketch, I put together the rooms for the horror room. Like the storyboard, I made everything black and white by changing the saturation on the materials with the hope that this would make the red lights stand out.
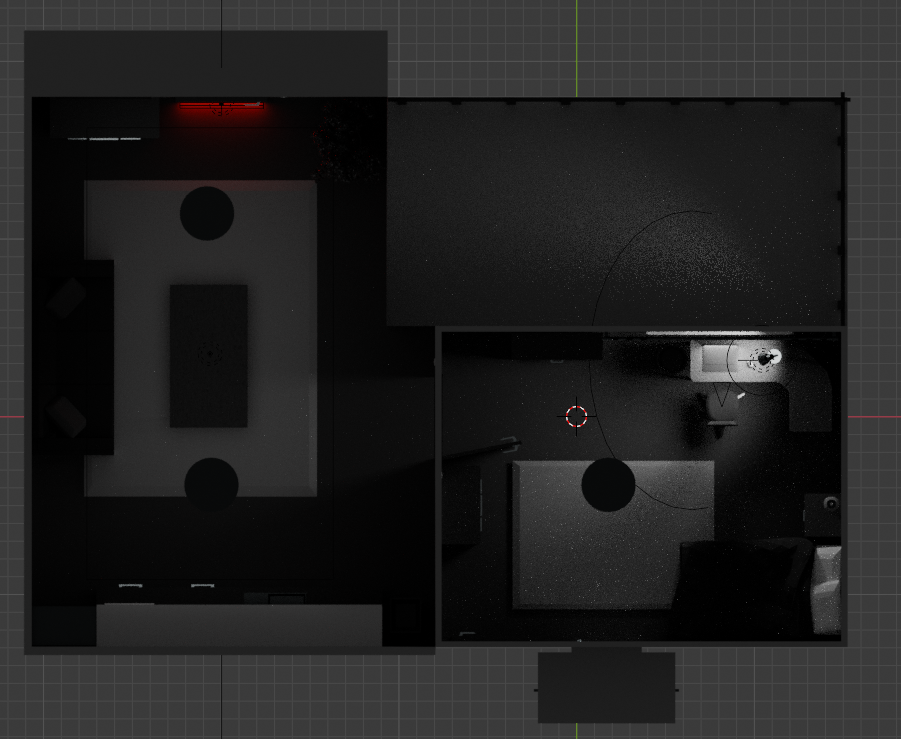
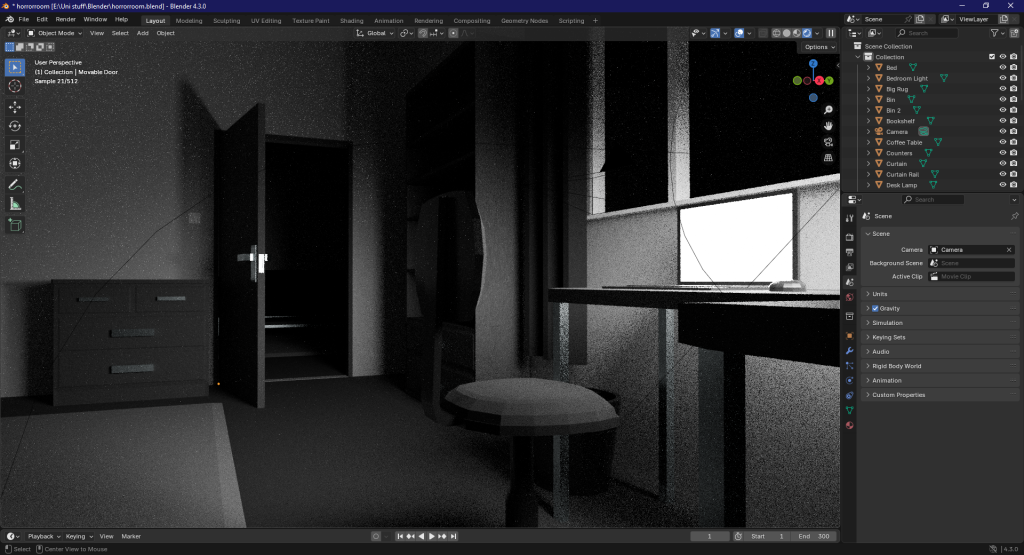
The first thing I did after modelling the set of rooms for the horror sequence was test the light levels and the height of the camera. Since it was going to be a fairly dark scene, I knew I needed to avoid my usual pitfalls, and even with the Open Brush sketch as a reference, it was a little more difficult to get the height correct on the office chair.
For the monster in this sequence, I had originally wanted to try and use Blender’s Grease Pencil feature to do the short animations, but as I was pressed for time, I instead took the sets of frames where movement was happening and drew directly onto them using Clip Studio Paint, as that is the programme I am most familiar with. I used a monster from an old, unfinished drawing, which ended up being part of the inspiration for this small sequence.
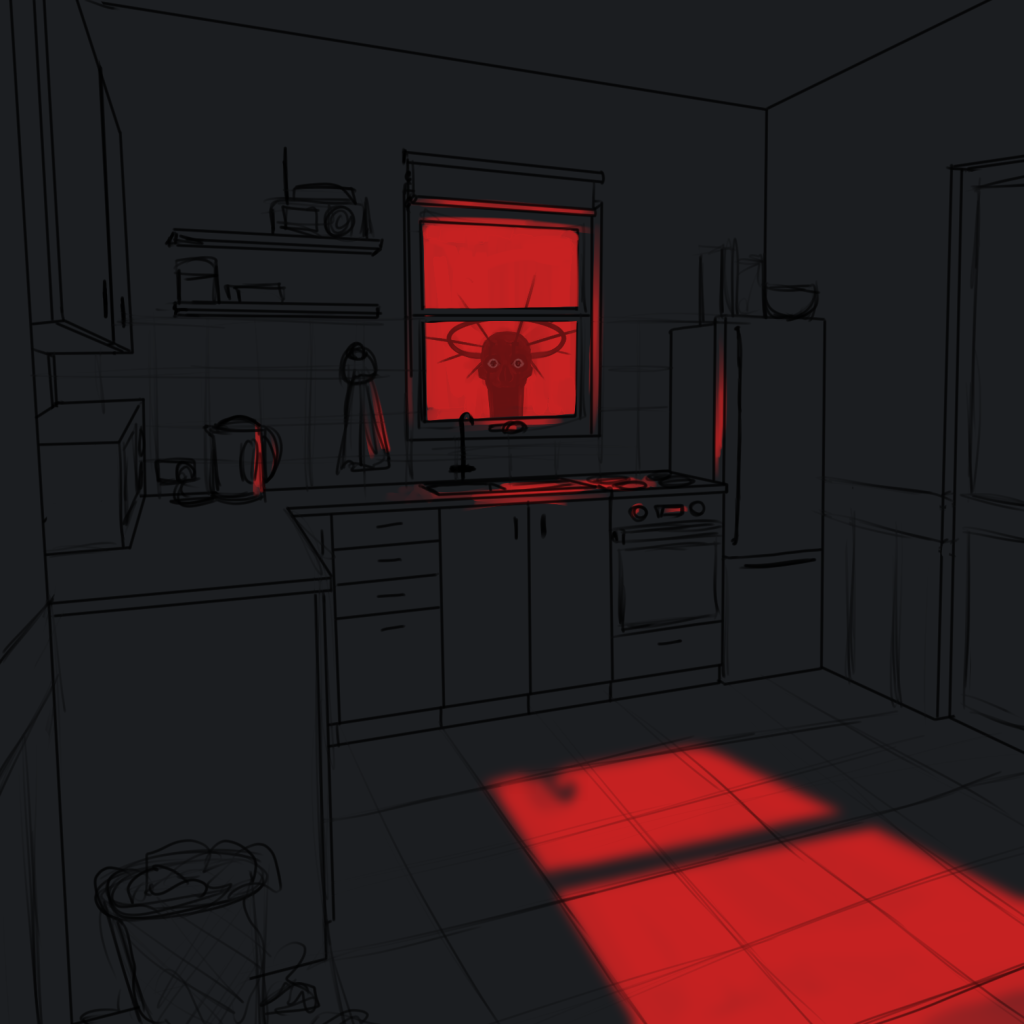
Since equirectangular renders initially come out with a distorted view of the environment so that it can be ‘wrapped’ around a sphere when converted to 360, the hand had to be distorted as the viewer camera came closer to it and focused on it.
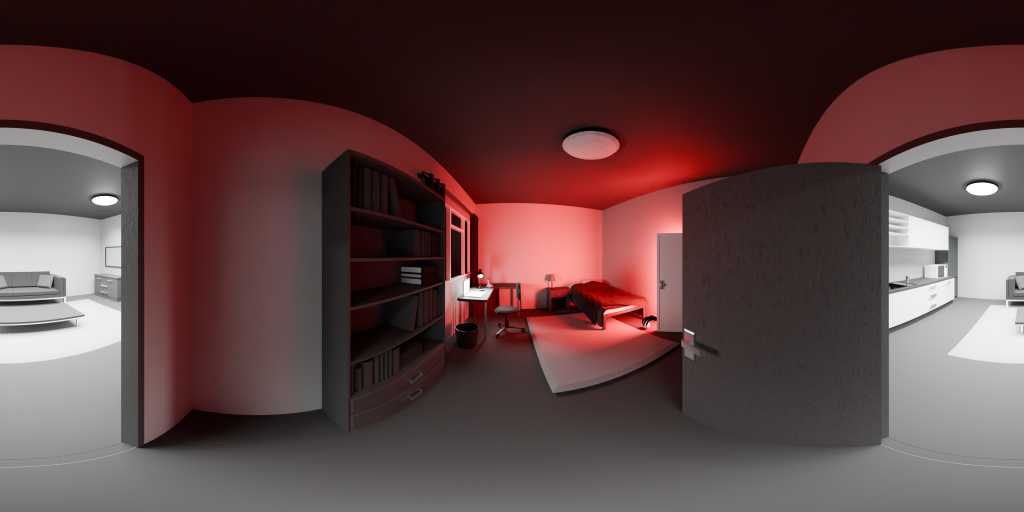
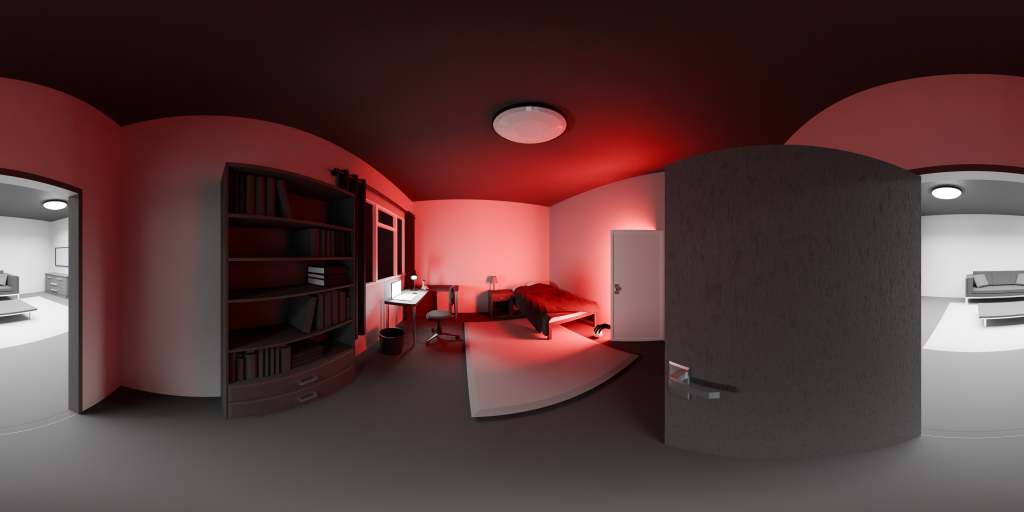
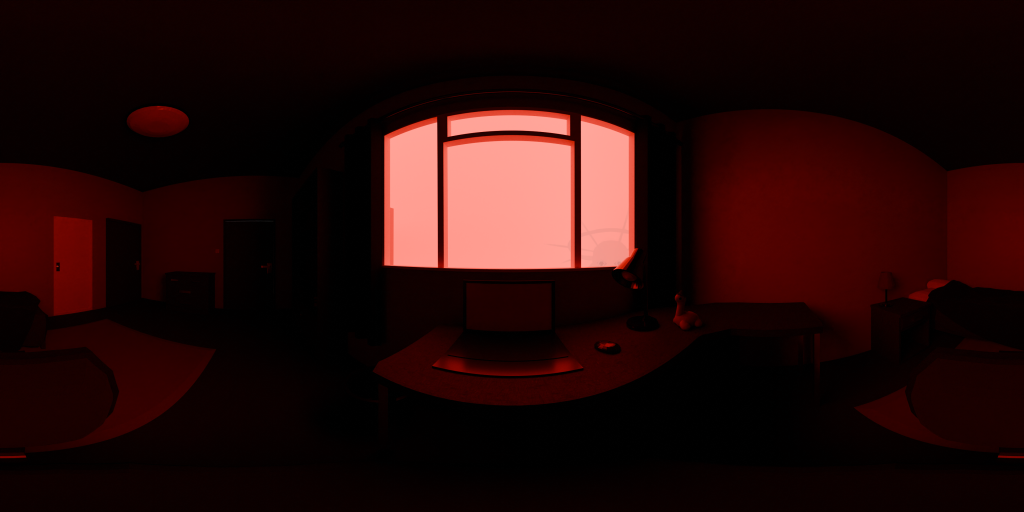
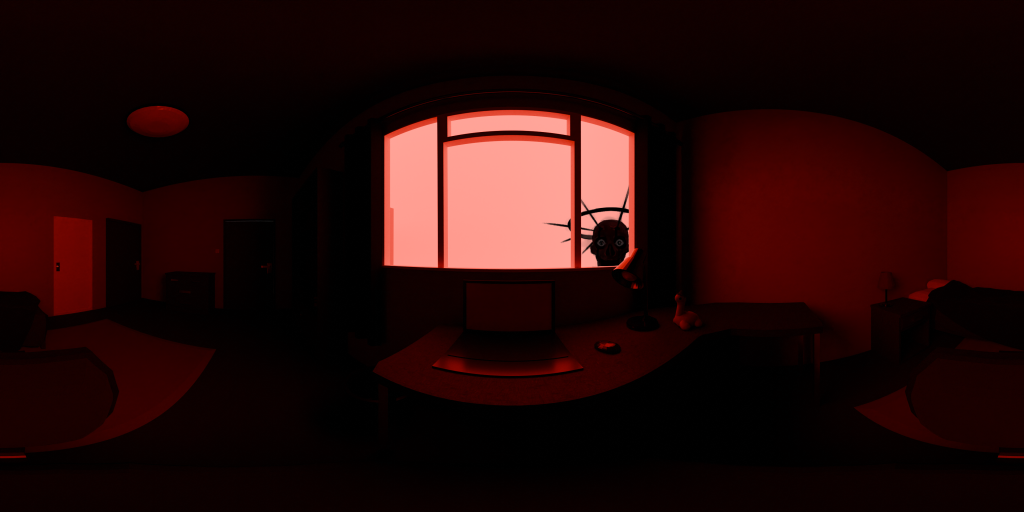
As mentioned before when talking about the hub room, I realised while putting together the sequence for this render that the way that the camera looked at certain objects and events was an issue. This is because, as I watched the 360 video, the camera did not reset its view when it moved elsewhere, so it became disorienting to have the camera tilted. A viewer could completely miss what I wanted them to look at, and it personally gave me motion sickness while I was testing the render because of the way that the camera tilted.
To fix this, I removed the parts of the animation that would tilt the camera towards something and re-rendered those sections. Below I have a comparison between the old and the new.
When rendering, I noticed that the plant was pink rather than greyscale. I had edited the leaf textures to be black and white, but it seems that the material decided to use the hidden flower texture that all the plants in the third-party pack used, so I edited the frames that the plant appears in while I was drawing the monster into frame.
I was going to simply turn it black and white, but after feedback, I was told that it looks good in the scene as an extra pop of colour, so I made it red to match the rest of the scene. Of course, if I were to do this again, I would have actually edited the material and re-rendered the scene.
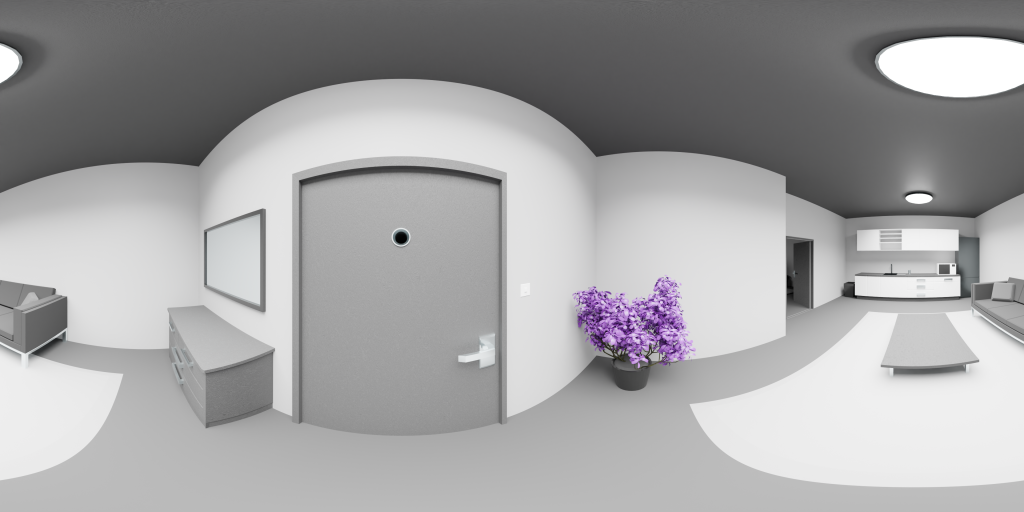
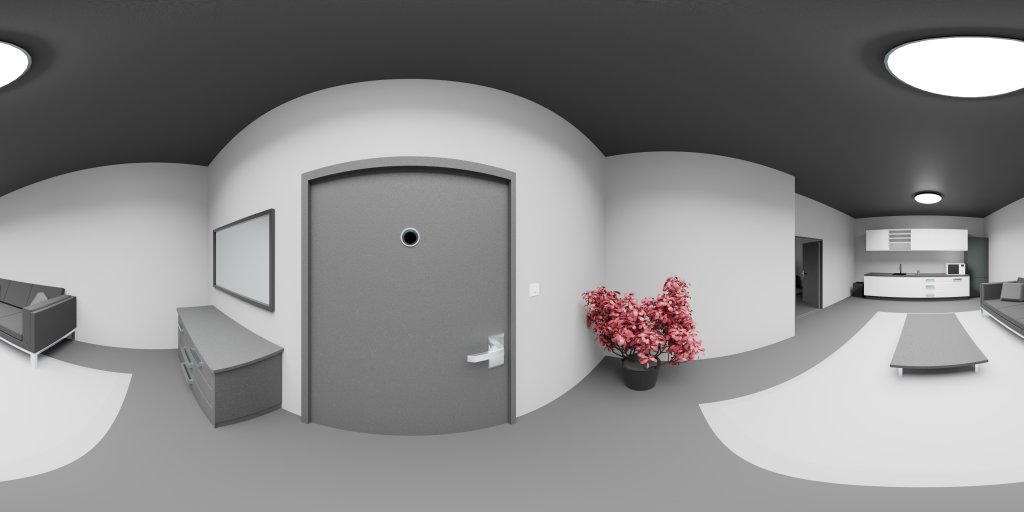
Ultimately, I think that I should have created a static experience for this room as well. When editing, I will be slowing down the footage and using separate frames to create periods of rest for the viewer, but I still don’t like the way that the camera moves in this sequence, and for me, motion sickness was unavoidable. For a wider audience, this would definitely become an issue if they were to view the sequence with something like a Google Cardboard device.
If I were to make this again, I would keep the viewer in a static position and focus more on the animations that could happen around them.
Final render for the Horror Room (before editing):
Premier Pro/Reaper (Ambisonic Sound)
The very first thing I added to the calm room sequence specifically was a transition at the very end to have the stars appear more naturally to the viewer, as I had been told that it was a little jarring to have them immediately pop in to the scene.
A big part of putting the piece together was separating the rendered frames into their own sequences so that I could have individual rest frames and better control the timings of the sequence. In the horror room scene, for example, before each camera movement, there is a single frame stretched out over a few seconds that the viewer can look around and re-orient themselves in if needed. I also use these rest frames to add the sounds that I want the viewer to be directed towards.
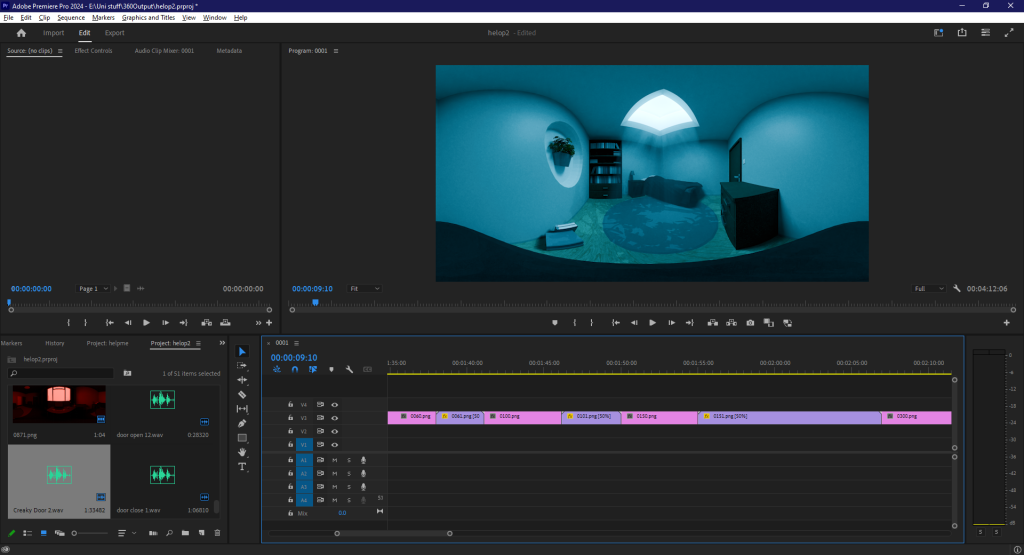
When first adding the sound, I looked into creating ambisonics that would create the illusion of a 3D space. For this, I had to turn to the DAW Reaper with the IEM and o3aCore plugins, as Premiere would only allow for ambisonic effects on sound files that were exported specifically for 360.
Compared to a VR version of this project, where I would simply place a sound cue in the position I wanted and add an attenuation volume, applying sound in this way for 360 was incredibly difficult. As I researched, it was clear that a lot of the better DAWs and plugins that could be used for this were prohibitively paywalled, or had been made obsolete by companies that didn’t want to continue investing in development, such as Facebook’s 360 studio. Even Premiere Pro had downgraded its ambisonic tools in future updates.
In the end, I added sounds into the scene without ambisonics, mixing volume levels to give the illusion that certain sounds happened further away than others to still try and direct the viewer towards the things that are happening, even if the sounds aren’t directional as intended. If I were to have done this differently, I would have made my own sounds and put them into the required format to be used properly in a 360 video.
Production Piece
Walk Through
References:
Adriano (2024). Ambisonics in Adobe Premiere. [online] Unipr.it. Available at: http://pcfarina.eng.unipr.it/adriano/AmbisonicsPremiere.html [Accessed 3 Jan. 2025].
Approximated | Digital Artist (2022). Make The Air Dusty | Blender Tutorial. [online] YouTube. Available at: https://www.youtube.com/watch?v=2zINkrq8tgs [Accessed 23 May 2024].
Arvid Falch (2022). Ambisonics spatial audio with Reaper and IEM. [online] YouTube. Available at: https://www.youtube.com/watch?v=CejOR83X6lM [Accessed 10 Dec. 2024].
atek (2017). How to make a curtain. [online] Blender Stack Exchange. Available at: https://blender.stackexchange.com/questions/71721/how-to-make-a-curtain [Accessed 5 Nov. 2024].
bd3d (2023). The Plant Library. [online] Blender Market. Available at: https://blendermarket.com/products/the-plant-library [Accessed 1 Dec. 2024].
BigRicePiano (2021a). Purity – Beautiful Piano Song, Relaxing BGM BigRicePiano. [online] YouTube. Available at: https://www.youtube.com/watch?v=Lox_jyvBBEk [Accessed 25 Nov. 2024].
BigRicePiano (2021b). White Moon – Beautiful & Sad Piano Song , Relaxing BGM BigRicePiano. [online] YouTube. Available at: https://www.youtube.com/watch?v=IBepaE3eFeM [Accessed 25 Nov. 2024].
Blender Secrets (2020). Daily Blender Secrets – Swaying plant with expression. [online] YouTube. Available at: https://www.youtube.com/watch?v=2HAiAONXZPc [Accessed 5 Dec. 2024].
Brandon 3D (2023). Cast Shadows from Invisible Objects in BLENDER 3D (Micro Tip). [online] YouTube. Available at: https://www.youtube.com/watch?v=9qpc2kJ77LY [Accessed 5 Dec. 2024].
crustacean (2018). Silent Hill 2 OST – White Noiz (Extended). [online] YouTube. Available at: https://www.youtube.com/watch?v=WZqiqeH_-o0 [Accessed 4 Jan. 2025].
Distorted Room (2017). Creaky Door Sound Effect. [online] www.youtube.com. Available at: https://www.youtube.com/watch?v=pKq51DHuLzU [Accessed 4 Jan. 2025].
FilmCow (n.d.). FilmCow Royalty Free Sound Effects Library by FilmCow. [online] itch.io. Available at: https://filmcow.itch.io/filmcow-sfx [Accessed 15 Dec. 2023].
Fry, G. (2024). Gareth Fry – Sound Design. [online] Gareth Fry – Sound Design. Available at: http://www.garethfry.co.uk/ambisonic-audio-workflows-for-360-films-and-vr [Accessed 4 Jan. 2025].
Kelman Greig-Kicks (2024). Neon8 Video and VR Production. [online] Neon8 Video and VR Production. Available at: https://neon8.scot/spatial-needs-the-confusing-world-of-ambisonic-for-vr-video/ [Accessed 4 Jan. 2025].
Lombardi, M. (2020). Ambisonic audio generator — Audio in 3D – Miki Lombardi – Medium. [online] Medium. Available at: https://thejoin95.medium.com/ambisonic-audio-generator-audio-in-3d-3f649c7669ab [Accessed 3 Jan. 2025].
manlian (2020). Reddit – Dive into anything. [online] Reddit.com. Available at: https://www.reddit.com/r/SpatialAudio/comments/jpb4ib/i_need_a_simple_ambisonics_tutorial/ [Accessed 3 Jan. 2025].
Michael G Wagner (2021). Ambisonics in Reaper. [online] YouTube. Available at: https://www.youtube.com/watch?v=fc5IXiR4KiQ [Accessed 16 May 2024].
Netzerland Studios- Film & VR Production (2024). How to create spatial sound (Ambisonic) for 360 video in Premiere. [online] YouTube. Available at: https://www.youtube.com/watch?v=SdUPGuaMo4U [Accessed 3 Jan. 2025].
Rudrich, D. (2023). IEM Plug-in Suite. [online] Plugins.iem.at. Available at: https://plugins.iem.at/#tab-RoomEncoder [Accessed 4 Jan. 2025].
Ryan King Art (2023). How to Model Easy Stars in Blender (Tutorial). [online] YouTube. Available at: https://www.youtube.com/watch?v=3fW3jnGXF58 [Accessed 5 Nov. 2024].
Ryan King Art (2024). Procedural Wood Plank Material (Blender Tutorial). [online] YouTube. Available at: https://www.youtube.com/watch?v=27AoKoTv7Q4 [Accessed 5 Dec. 2024].
Sina Sinaie (2023). High-Contrast God Rays with This Simple Trick – Blender Tutorial. [online] YouTube. Available at: https://www.youtube.com/watch?v=8U-TVkdH_Ps [Accessed 5 Dec. 2024].
soundfx (2023). Empty Room Ambient Noise Sound Effect. [online] www.youtube.com. Available at: https://www.youtube.com/watch?v=8m91-gu-x8U [Accessed 4 Jan. 2025].
Yeager, C. (2022). How to Mix Ambisonics in Premiere Pro. [online] The Beat: A Blog by PremiumBeat. Available at: https://www.premiumbeat.com/blog/how-to-mix-ambisonics-in-premiere-pro/ [Accessed 3 Jan. 2025].